Meeting Recap Process: Preserve Decisions and Project Memory
Meeting Recap Process: Preserve Decisions and Project Memory

Convert every design meeting that produces a decision into a short ILM Record: context, options considered, the outcome, and the reasoning behind it. That’s the entire meeting recap process. Skip this step and you’re left reconstructing “why did we drop the curtain wall detail” six months later from someone’s fading memory or a half-finished email thread.
Do it right and three things happen fast:
- Rework drops because the reasoning behind a decision travels with the project, not just in someone’s head.
- Onboarding speeds up because new team members read the decision history instead of interrupting five people to ask what happened in March.
- Design decisions become defensible when a client or code official asks why you specified a particular assembly.
The Architectural decision record framework that inspired this approach makes the same case for software teams: capture the option considered, including the ones you rejected, or you lose the rationale that made the decision correct in the first place.
Your next step: pick your next design review meeting this week and run a one-minute capture ritual at the end of every decision point. Ask “what did we just decide, and why,” write it down, and turn it into a record before you leave the room.
Key Takeaways
A meeting recap process only works when every design decision gets captured as a short, source-backed record with context, rejected options, and rationale attached.
| Point | Details |
|---|---|
| Assign ownership upfront | Name the record author before the meeting starts, not after notes are already scattered. |
| Capture six fields minimum | Context, options considered, rejected options, decision, trade-offs, and confidence level. |
| Finalize within 72 hours | Draft during the meeting, clean up the record while memory is still sharp. |
| Never edit accepted records | Create a superseding record and link it instead of rewriting history. |
| Pilot with The Intent Ledger | Configure the template, run two projects for two weeks, and track rework RFIs and lookup time. |
Where to go deeper
- For a proven decision-record template structure, see the Azure architecture decision record guide.
- For lifecycle and ownership rules, consult AWS’s ADR process guidance.
- For linking rationale to BIM elements and model geometry, read the research on explanation tags and design episodes.
- For technical drawing standards that pair well with decision records, see this technical drawing checklist for architects.
What’s the difference between a meeting recap process and generic meeting notes? Generic meeting notes summarize what was discussed. A meeting recap process built around ILM Records captures the decision itself: the options considered, which ones were rejected and why, and the confidence level behind the final call. That’s what makes it traceable later.
How long should an ILM Record take to write? Most records take 10 to 15 minutes to finalize once the meeting notes are captured, assuming the scribe used the imperative-language template during the discussion itself.
Who should own the meeting recap process on a small team? Rotate ownership rather than assigning it permanently to one person. A junior designer, project manager, or freelance architect can all serve as author; what matters is that someone is explicitly assigned before the meeting starts.
Can I run this process without special software? Yes. A shared document or wiki page works for a small studio, as long as records are stored where the whole team already looks. The structure and discipline matter more than the tool, though dedicated software like Theintentledger removes the manual step of transcribing and tagging every record by hand.
Table of Contents
- What Does the Meeting Recap Process Actually Look Like?
- What Fields Belong in an ILM Record Template?
- How Do You Capture Decisions Without Derailing the Meeting?
- Who Owns a Record, and When Does It Change State?
- How Should You Organize Your Growing Library of Records?
- How The Intent Ledger Fits Into Your Pilot
- Sources
What Does the Meeting Recap Process Actually Look Like?
A workable meeting recap process is a short checklist, not a document management project. It works because it assigns ownership before the meeting starts and finalizes the record shortly after it ends, instead of letting notes rot in someone’s notebook.
Before the meeting: someone owns the record. Assign this at the invite stage, not after the fact. If your studio runs weekly design reviews, rotate ownership so the task doesn’t always land on the same junior designer.
During the meeting, capture six things for each decision point: the problem or context, the options discussed, which ones got rejected and why, the chosen option, the trade-offs accepted, and a rough confidence level (high, medium, low). Link any evidence, sketches, or code references mentioned on the spot.
After the meeting, the author finalizes the record within 24 to 72 hours while memory is still sharp, sets its state to “Proposed,” and links supporting artifacts like drawings or transcripts. Google Cloud’s guidance on architecture decision records makes a similar point: start with a simple template and store it somewhere the team already looks, or adoption stalls before it starts.
| Role | Responsibility | Timing |
|---|---|---|
| Author | Captures notes live, drafts the record | During meeting, finalized within 72 hours |
| Reviewer | Checks accuracy, flags missing rationale | Within 24 to 72 hours |
| Approver | Sets state to Accepted or Rejected | At next scheduled review |
| Librarian | Maintains tagging, links, and supersession chain | Ongoing |
Pro Tip: In a loud critique with six people talking over each other, don’t try to capture full sentences. Write the decision as a single imperative line (“Use double-glazed unit at south facade”) and the one phrase that swung the room. You can flesh out nuance in the 72-hour edit window.
What Fields Belong in an ILM Record Template?
The template matters more than any tool you run it in. A record missing “options rejected” is just a summary, not a decision record, and it won’t help anyone six months from now who’s wondering why the obvious alternative wasn’t chosen.
Here’s the field structure, based on the decision detail viewpoint research on capturing sufficient depth per decision:
| Field | What to write | Target length |
|---|---|---|
| Title | Short, specific, searchable | a single imperative line |
| Timestamp & authors | Date, meeting, who was present | 1 line |
| Context | What problem or constraint triggered this decision | 2 to 3 sentences |
| Requirements | Architecturally significant criteria (fire rating, acoustics, structural load) | Bullet list |
| Options considered | Each option with the reason it was rejected | 1 to 2 lines per option |
| Decision | Stated in imperative language | 1 sentence |
| Trade-offs & consequences | What you gave up, what you gained | 2 to 3 sentences |
| Confidence level | High, medium, or low | 1 word |
| Linked artifacts | Drawings, specs, transcript timecode | Links |
| Status | Proposed, Accepted, Rejected, Superseded | 1 word |
A filled sample, condensed:
Title: South facade glazing spec Context: Client requested daylight maximization; energy model flagged solar heat gain risk on south elevation. Options considered: (1) Single-pane with external shading, rejected for maintenance cost. (2) Double-glazed low-E unit, selected. (3) Triple-glazed, rejected as over-spec for climate zone. Decision: Use double-glazed low-E unit rated at 0.28 SHGC for the entire south facade. Trade-offs: Higher unit cost than single-pane, but avoids ongoing shading maintenance and meets energy target without triple-glazed premium. Confidence: High.
Pro Tip: Write the decision line in imperative language. “Use the low-E unit” is scannable and unambiguous six months later. “We should probably go with the low-E unit” reads like a suggestion nobody actually confirmed.
Linking rationale directly to model elements takes this further. Research on explanation tags and design episodes describes tagging BIM elements with the reasoning behind them so a later query can pull up not just the geometry, but why it exists.
How Do You Capture Decisions Without Derailing the Meeting?
Capture works when it’s fast enough that nobody notices it’s happening. Designate a scribe before the meeting starts, not mid discussion when someone finally realizes no one is taking notes.
A few tactics that hold up in real critiques:
- Open each decision point with a quick verbal framing: “So we’re deciding between A and B, here’s why.”
- Record audio when possible and attach timecodes to the ILM Record so a reviewer can jump straight to the moment rationale was discussed.
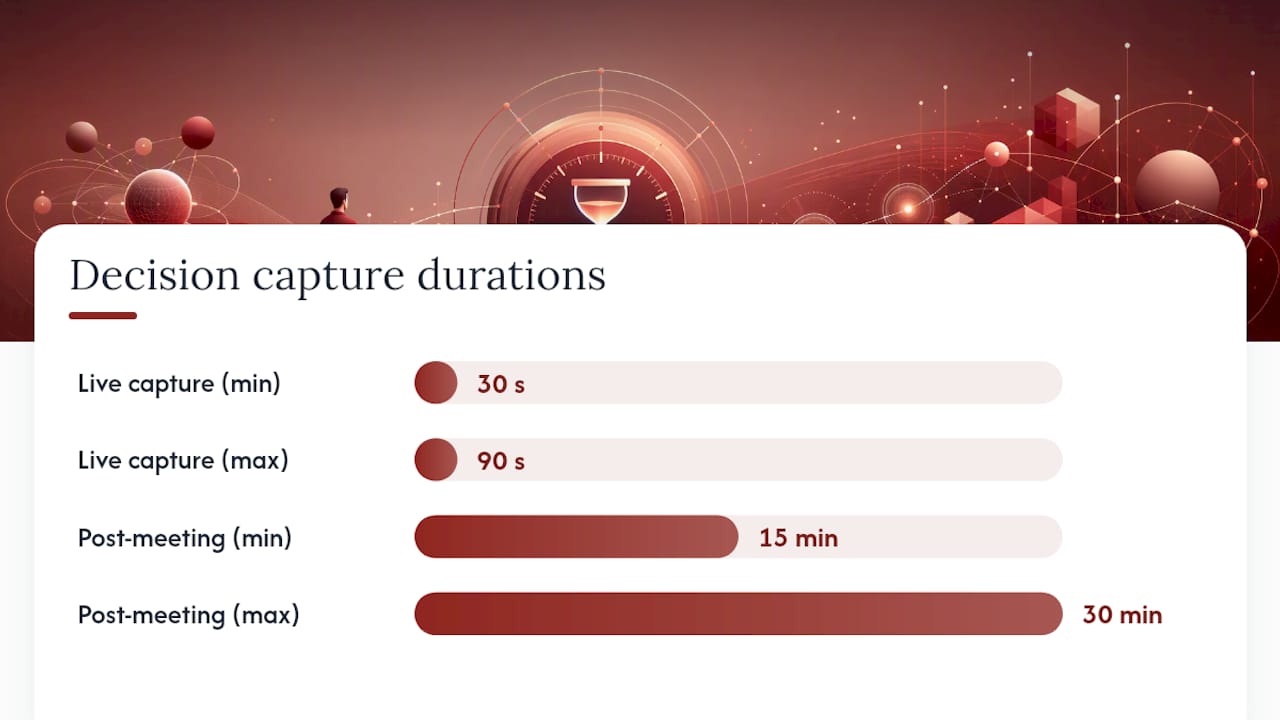
- Cap live capture at 30 to 90 seconds per decision. Anything longer means you’re drafting the full record mid-meeting, which slows everyone down.
- Reserve a 15 to 30 minute post-meeting window to clean up notes into a proper record while the discussion is still fresh.
- For critique sessions specifically, ask three questions out loud: what problem are we solving, what options did we consider, and what convinced us.
Linking sketches and model references matters as much as the text. Keeping file naming and organization consistent across a studio means the artifact you want to link actually exists where you expect it, instead of buried in someone’s desktop folder from three weeks ago.
Pro Tip: If your critique sessions run long and loud, assign the “what convinced us” question to one specific person each time. Rotating that job keeps the scribe honest and stops rationale from getting lost in cross-talk.
Who Owns a Record, and When Does It Change State?
Every ILM Record moves through four states, and confusing them is where most studios lose the thread. Proposed means captured but not yet reviewed. Accepted means the team has signed off and it’s now the record of truth. Rejected means the option was considered and explicitly turned down, worth keeping so nobody re-litigates it in six months. Superseded means a later decision replaced this one, and the two records link to each other.
Ownership follows a simple structure:
- The author who captured the meeting drafts the initial record.
- A reviewer, usually a project lead, checks it for accuracy and completeness.
- An approver (often the studio principal or PM) sets it to Accepted.
- A librarian or record steward maintains tagging and the supersession chain across the whole project.
Review cadence should match project intensity: weekly triage for active projects, a quarterly deep review for archived decisions, and an expedited review whenever a decision gets challenged by new information.
The changelog rule that keeps this system trustworthy: never edit an accepted record. If a decision changes, create a new record that supersedes the old one and link them explicitly. Editing history in place destroys the exact trail you built the system to preserve.
That’s a modest tax against the hours lost re-litigating decisions nobody wrote down the first time.
How Should You Organize Your Growing Library of Records?
A pile of individual records is only half the system. You need three complementary views to make the library actually useful over the life of a project.
- Decision Detail view. Full depth on a single decision, for the person implementing it or an auditor checking it later.
- Relationship view. A diagram showing how decisions connect and depend on each other, useful for spotting conflicts before they hit construction.
- Chronological view. The sequence of decisions over time, which helps a reviewer or new hire understand how the design actually evolved, not just where it landed.
Case study work on decision viewpoints found the upfront effort to build these views was small relative to total project effort, and it paid back in faster onboarding and fewer repeated debates.
Tag every record with metadata that supports fast lookup later:
- Project phase (schematic design, design development, construction documents).
- Building system (envelope, structure, MEP).
- Performance criteria (fire rating, acoustic rating, thermal performance).
Structure your index by project phase first, then by system. A new hire searching “why is the south facade glazing spec’d this way” should find the record in under a minute, not after asking three people who weren’t even in the room.
An honest note on adoption
Most studios resist this at first. It feels like overhead until the first time a record saves someone from rebuilding a decision from scratch.
Pro Tip: Don’t roll this out studio-wide on day one. Pick your highest-stakes recurring meeting, run it there for three weeks, and let the results make the case for everyone else.
How The Intent Ledger Fits Into Your Pilot
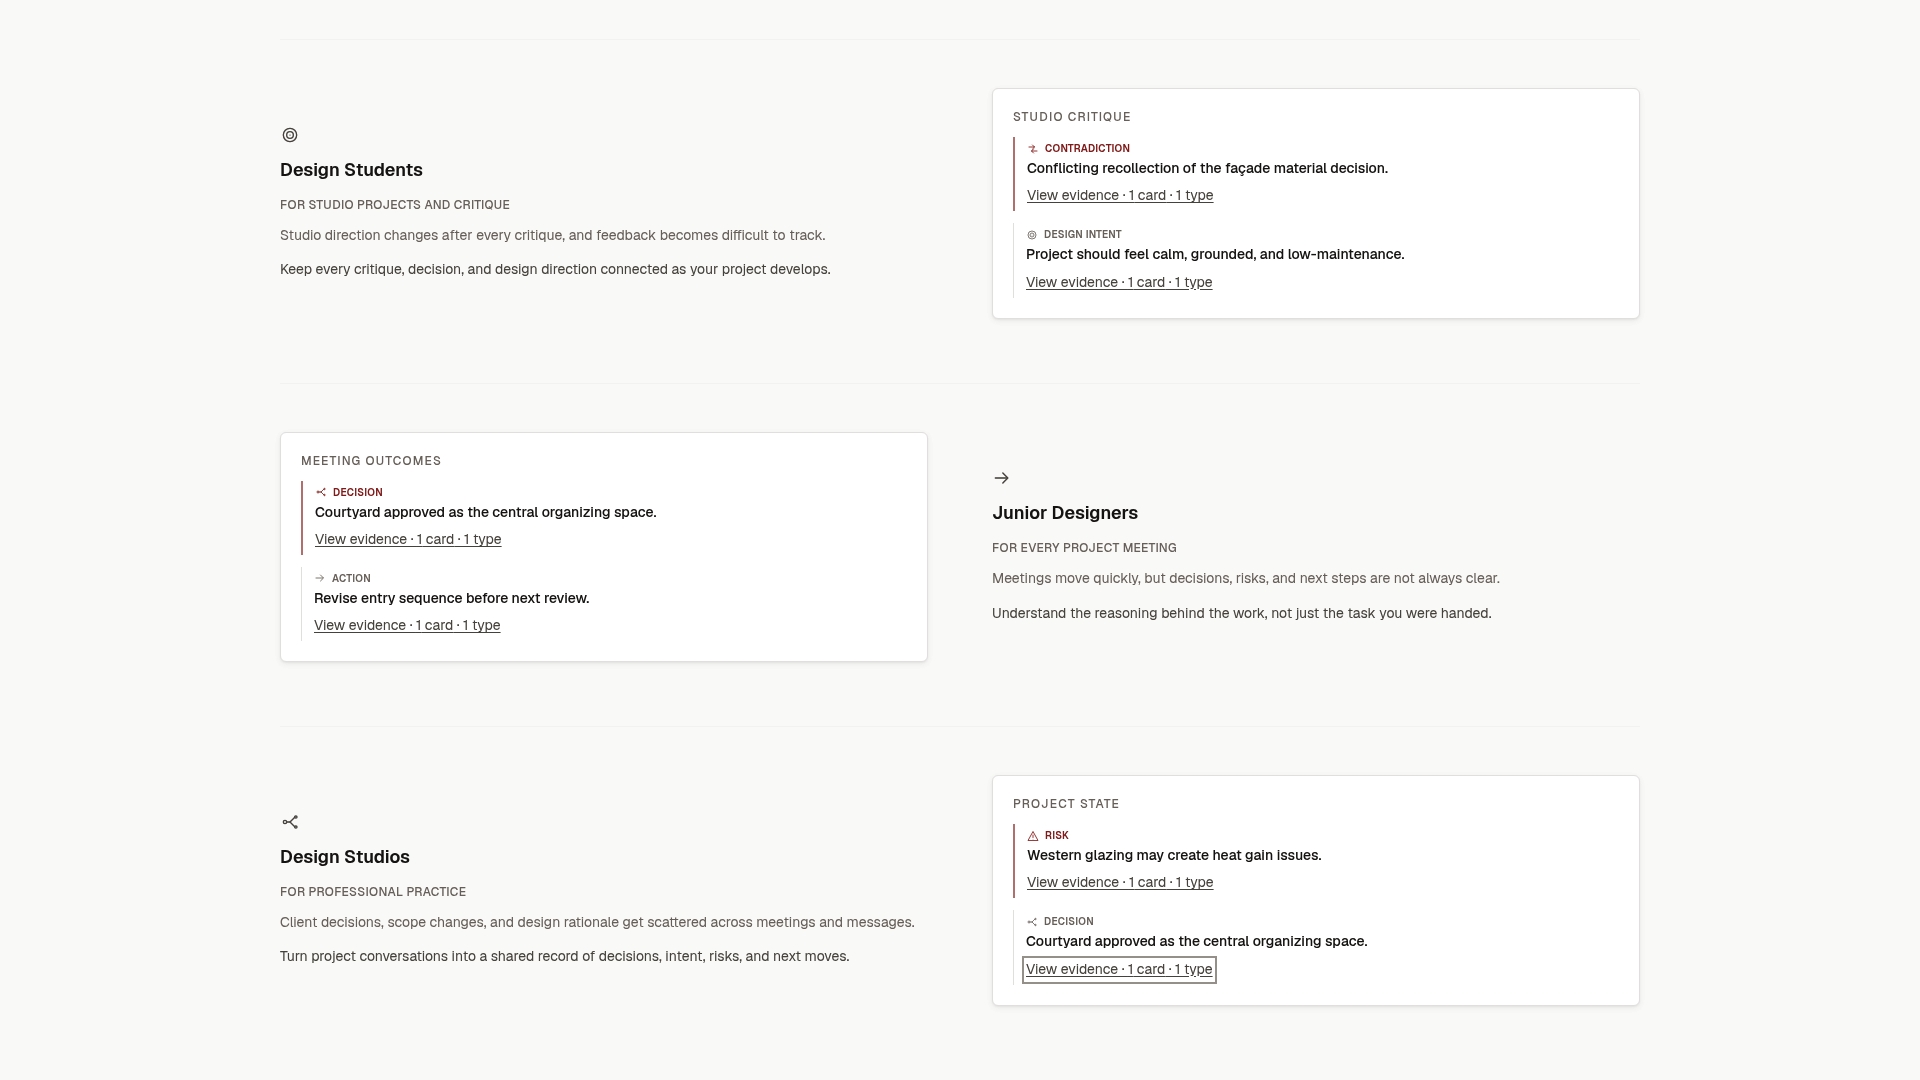
The Intent Ledger is project memory software built for exactly this workflow: it turns meeting conversations, transcripts, and critique feedback into structured, source-backed ILM Records, so the decision and the reasoning behind it stay linked to where they actually happened.
Running a pilot doesn’t require overhauling your whole documentation system. Configure the ILM Record template to match your studio’s fields, then run it across two active projects for two weeks. Track three things during that window: how long it takes someone to locate a past decision, how many rework RFIs trace back to something that was never written down, and how many team members actually use the tool without prompting.
If time-to-lookup drops and undocumented-decision RFIs shrink, you’ve got your case for a full rollout. Start the pilot with the Theintentledger platform and configure your first template this week.
Sources
- architecture-decision-record
- Architectural decision records (AWS Prescriptive Guidance PDF)
- doc-framework-decisions.pdf
- Journal article on explanation tags, design episodes, and multi-LOD meta-model
- Architecture decision records (Google Cloud)